This guide walks you through creating a popup with an Elementor form that integrates with Agentbox to submit enquiry data seamlessly.
Step 1: Create a Popup
Go to Elementor Templates: Navigate to Templates > Popups in your WordPress admin dashboard.
Add New Popup: Click the Add New button and give your popup a name.
Design the Popup:
Use Elementor’s drag-and-drop interface to create a visually appealing popup or use one of many Elementor templates.
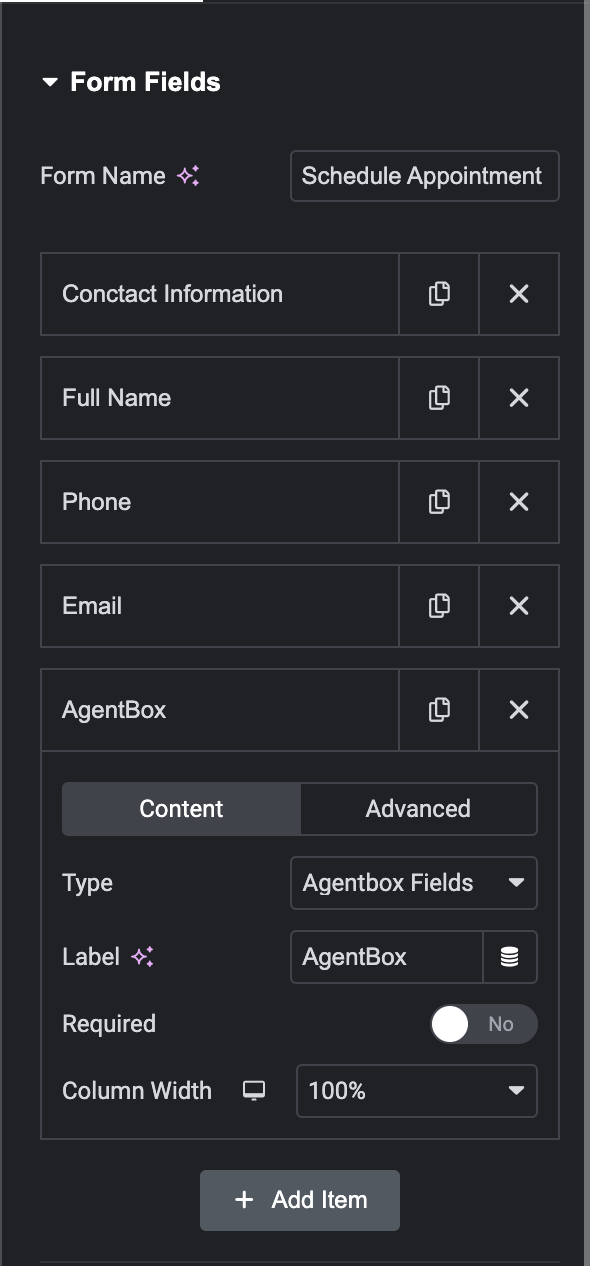
Step 2: Add Form Fields
Add a Form Widget: Drag the Form widget into your popup layout.
Configure Form Fields: Add the following fields to collect user information. Make sure the ID names match exactly, letter by letter, as shown below:
Full Name:
Label: Full Name
Type: Text Field
Required: Yes
ID: name
Phone:
Label: Phone
Type: Text Field
Required: Yes
ID: phone
Email:
Label: Email
Type: Email Field
Required: Yes
ID: email
Comment:
Label: Comment
Type: Textarea Field
Required: Yes
ID: comment
Agentbox:
Label: AgentBox
Type: Agentbox Fields
Required: Yes
Note: The ID names (name, phone, email, comment) are case-sensitive and must match exactly. Incorrect IDs may result in data not being submitted to Agentbox.
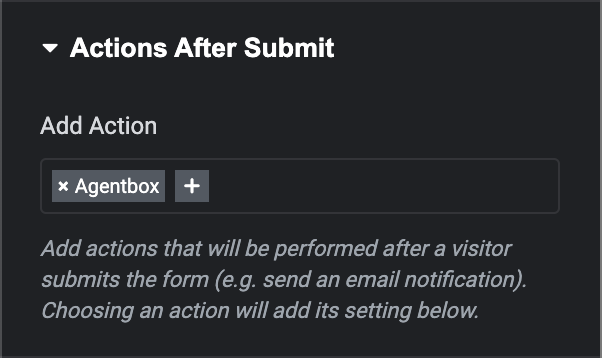
Step 3: Configure Actions After Submit
Expand the Actions After Submit Section:
In the Form settings, look for the Actions After Submit panel.
Add the Agentbox action to the list of actions.
Enable Other Actions (Optional):
You can configure additional default actions, such as sending an email notification or saving the form data, without interrupting the Agentbox integration.
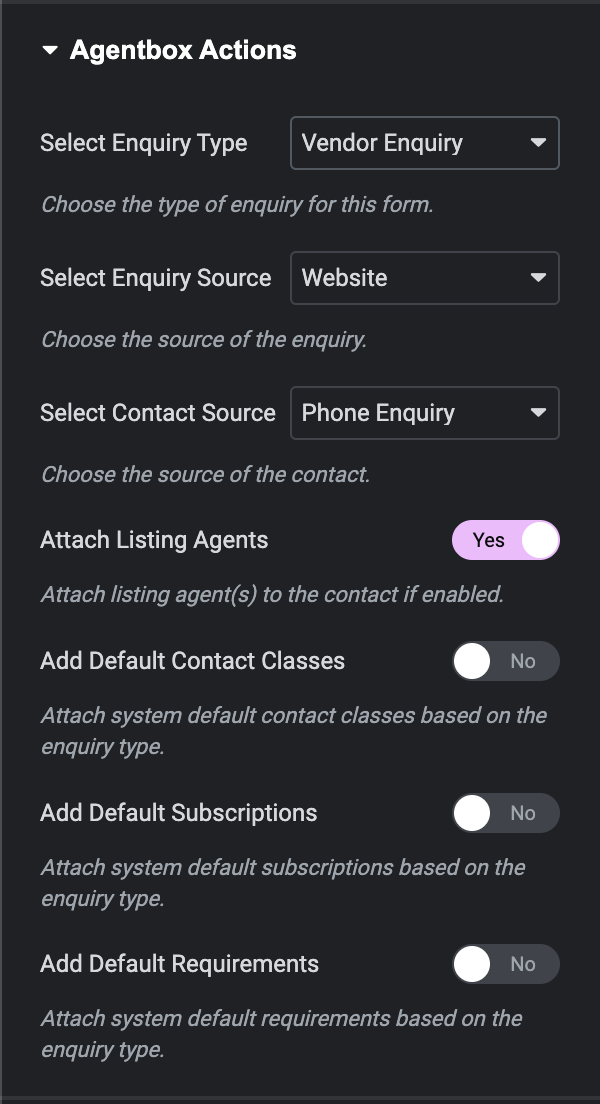
Step 4: Set Up Agentbox Actions
Expand the Agentbox Actions section in the Elementor form settings. Configure the following options to define how the enquiry data should be handled:
Select Enquiry Type:
Choose the type of enquiry for this form (e.g., Vendor Enquiry).
Select Enquiry Source:
Set the source of the enquiry (e.g., Website).
Select Contact Source:
Define the contact source (e.g., Phone Enquiry).
Attach Listing Agents:
Toggle this option to Yes if you want to attach listing agent(s) to the contact.
Add Default Contact Classes:
Enable this option to attach system default contact classes based on the enquiry type.
Add Default Subscriptions:
Turn this option on to attach system default subscriptions based on the enquiry type.
Add Default Requirements:
Enable this to attach system default requirements based on the enquiry type.
Configure these options based on your specific needs to ensure the enquiry data is accurately sent and categorized within Agentbox. If you’re unsure about any settings, consult the Agentbox documentation or reach out to their support team for guidance.
Step 5: Trigger the Popup with a Button
Add a Button Widget:
Drag a Button widget to your Elementor page design.
Set the button’s action to open the popup you just created.
Customize Button Text and Style: Update the button text to something like Enquire Now and style it to match your site’s design.
Step 6: Test the Integration
Test Popup Display:
Preview your page and click the button to ensure the popup opens as expected.
Submit Test Enquiry:
Fill out the form and submit a test enquiry.
Check your Agentbox account to confirm that the enquiry has been successfully created.
Advanced Configuration
Conditional Logic:
Use Elementor’s conditional logic to display certain fields or trigger specific actions based on user input.
Custom Styling:
Style your popup and form fields to align with your brand identity.
Error Handling:
Configure error messages for validation issues (e.g., missing fields or incorrect data formats).
Common Issues and Troubleshooting
Validation Errors: Ensure all required fields for Agentbox are included and properly configured. Missing Full Name, Email, or metadata fields can cause submission failures.
Popup Not Triggering: Check that the button action is correctly linked to your popup.
Data Not Reaching Agentbox:
Verify that the Agentbox action is added to Actions After Submit.
Check the Agentbox configuration settings for errors.